Family Fun Art at Home: Printmaking
July 15th, 2020
Missing out on this month’s free Family Fun Saturday at the Museum? Not to worry. Here are a few at-home art projects to teach your kids the basic principles of printmaking. (And that contrary to popular wisdom, playing with your food can sometimes be – what’s the word? Impressive.)
Don’t miss our exhibition of American Prints II: From the Butler Institute of American Art, on view through September 13, 2020 at the Museum of Art – DeLand’s downtown location.
Printmaking with Fruits & Vegetables
Materials:

-
-
- Tempera or poster paint (for paper)
- Fabric paint or acrylic paint (for fabric)
- A Styrofoam tray or plate
- Paintbrushes or sponges
- Water and water containers
- Paper or fabric
- A work area covered with newspaper
- Fruits and veggies of all kinds. Some good ones are: starfruit, apples, pears, oranges, lemons, celery (cut ends of individual stalks or the cut end of the entire stalk), broccoli, cauliflower, bell peppers, potatoes, carrots, corn, mushrooms, bok choy, brussel sprouts, snow peas, okra
-
Directions:
-
-
-
- Prepare the fruits and veggies.

- Prepare the fruits and veggies.
-
-
-
-
-
-
- Broccoli and cauliflower – separate into individual florets
- Okra – cut into 1-inch long pieces
- Bok choy and celery – trim off the base
- Brussel sprouts – cut in half, either crosswise or lengthwise
- Potato – slice into quarters, wedges, or cut into specific shapes such as a flower or star
- Carrot – same as potato
- Mushroom – slice button or any round mushrooms in half
- Bell pepper – slice crosswise in half, remove the seeds
- Most fruits – just cut in half
-
-
-
-
-
- Prepare your paint on the tray or plate. Apply paint directly to the fruit/vegetable with a paintbrush or sponge. If using a sponge, dip into the paint. You don’t need a lot. Dab the paint onto the fruit/vegetable and then print.
-
-
-
- Carefully place the fruit/vegetable, painted side down, on your paper. Press firmly for several seconds to transfer the paint onto the paper.
-
-
-
- Remove the fruit/vegetable.
-
-
-
- Repeat the process using different colors and other shapes to fill your paper. Once you’re happy with how your picture looks, allow the paint to dry completely.
-
Potato Prints
 Materials:
-
-
- Newspapers
- Paper towels
- Potatoes
- Tempera or poster paint (for paper)
- Fabric paint or acrylic paint (for fabric)
- Paint brushes or sponge
- Styrofoam tray or plate
- Water and water containers
- Small knife (plastic ones are okay)
- Fabric or paper
- Paper towels
-
 Directions:
-
-
-
- Cover your work area with newspaper.
-
-
-
-
-
- Wash the potatoes.
-
-
-
-
-
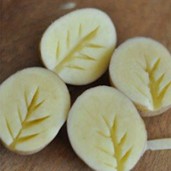
- Cut tops off about 2 inches down and begin carving your shape into the white of the top of the potato. When you cut the design, make sure it’s at least 1/3 of an inch raised from the top.
-
-
-
-
-
- Prepare different colors of paint on your tray/plate.
-
-
-
-
-
- Take a paper towel and dry the tops before applying the paint. You can use a brush or sponge for the paint. Press the potato firmly onto the fabric or paper. Lift and check your print. Repeat.
-
-
Leaf Prints
 Materials:
-
-
-
- Real leaves
- Paper or fabric
- Tempera or poster paint (for paper)
- Fabric paint or acrylic paint (for fabric)
- Paint brushes or sponges
- Styrofoam tray or plate
- Newspaper
- Water and water containers
-
-
 Directions:
-
-
-
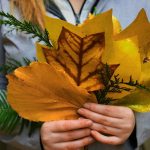
- Collect leaves of various shapes and sizes. Both fresh and fallen leaves will work for this craft.
-
-
-
-
-
- Cover your work area with a mat or with newspapers. Prepare different colors of paint on your tray/plate. Add just enough water to make the paint spreadable but not runny. Cut your paper or fabric to the desired size.
-
-
-
-
-
- Take one leaf. Flip it so that the underside is facing up. Paint the entire surface of the leaf with your paint brush or use a sponge dipped into the paint.
-
-
-
-
-
- Carefully place the leaf, painted side down, on your paper or fabric. Press firmly for several seconds to transfer the paint from the leaf to the paper or fabric.
-
-
-
-
-
- Remove the leaf to reveal a leaf print.
-
-
-
-
-
- Repeat the process using different colors and other leaf shapes to fill your paper or fabric with leaf prints. Once you’re happy with how your picture looks, allow the paint to dry completely.
-
-


